Cheap DIY Home Decor Ideas for Apartments
Discover 10+ cheap DIY home decor ideas for apartments you can make for under $20. Create budget-friendly, upcycled decor that looks amazing!
Style on a Budget: 10 Gorgeous DIY Decor Projects You Can Make for Under $20
There’s a common misconception that creating a beautiful, stylish home requires a huge budget. I’m here to tell you that’s absolutely not true. As the creator of Neat Tiny Home, I’ve built my entire philosophy around the idea that a thoughtful, personalized home is far more valuable than an expensive one. And nothing brings more personality and charm into a space than decor you’ve created with your own two hands. For those of us in apartments or small spaces, DIY decor is even more perfect—it’s customizable to our exact dimensions and often much more renter-friendly. This guide is my passion project, a collection of my absolute favorite cheap DIY home decor ideas for apartments, with every single project costing less than $20 to make.
We’re about to dive into ten projects that prove you don’t need a lot of money or a professional art degree to create stunning pieces for your home. This is all about celebrating creativity and resourcefulness. We’ll be focusing on accessible materials, simple techniques, and high-impact results. These projects are perfect for a lazy weekend and are designed to give you that incredible boost of pride that comes from standing back and saying, “I made that.” From stylish storage to custom art, we’ll cover a range of ideas that lean heavily on budget-friendly decor principles and the magic of upcycled home decor. Get ready to unleash your inner artist and transform your apartment into a unique reflection of you, without breaking the bank.
The Joy of DIY: Why Making Your Own Decor is Perfect for Apartment Living
Before we grab our glue guns, let’s talk about why DIY is the ultimate solution for apartment dwellers. It’s about so much more than just saving money. Creating your own decor empowers you to overcome the typical limitations of a rental. You can’t paint the walls? No problem, you can create a massive, colorful piece of canvas art that becomes the room’s focal point. Awkwardly-sized nook you can’t find furniture for? Build a custom-fit shelf! DIY allows you to tailor pieces to your specific style, color palette, and spatial needs in a way that off-the-shelf decor rarely can. It’s the key to making a generic, cookie-cutter apartment feel like a truly personal home. These cheap DIY home decor ideas for apartments are your ticket to a home that is uniquely yours.
Beyond the Budget: The Personal Touch You Can’t Buy
The true beauty of a DIY project is the story it tells. The slightly imperfect, hand-painted pot holds more character than any mass-produced one. The wall hanging you knotted yourself carries the memory of a quiet afternoon spent creating. These pieces infuse your home with your personality and energy. They become conversation starters and sources of personal pride. While the main draw might be creating budget-friendly decor, the lasting reward is a home that feels authentic and curated by you, for you. It’s a space filled with stories, not just stuff. For endless inspiration on creating a personalized home, I often turn to blogs like A Beautiful Mess, which is a treasure trove of creative ideas.
Essential Tools for Your Budget DIY Toolkit
You don’t need a professional workshop to tackle these projects. Most of these ideas can be accomplished with a very basic toolkit. Here’s a quick list of essentials I recommend having on hand. The great thing is, you likely own most of these already!
- A good pair of scissors
- A hot glue gun and extra glue sticks
- A ruler or measuring tape
- A basic set of craft paint brushes
- A staple gun (for fabric projects)
- Sandpaper (a small variety pack is great)
- Super glue or a strong craft glue like E6000
| DIY Project | Estimated Cost | Key Supplies |
|---|---|---|
| 1. Upcycled Jar Lanterns | $5 – $10 | Recycled jars, spray paint, twine |
| 2. Abstract Canvas Art | $15 – $20 | Thrifted canvas, sample pot paints |
| 3. Fabric Bulletin Board | $10 – $15 | Cork board, fabric remnant |
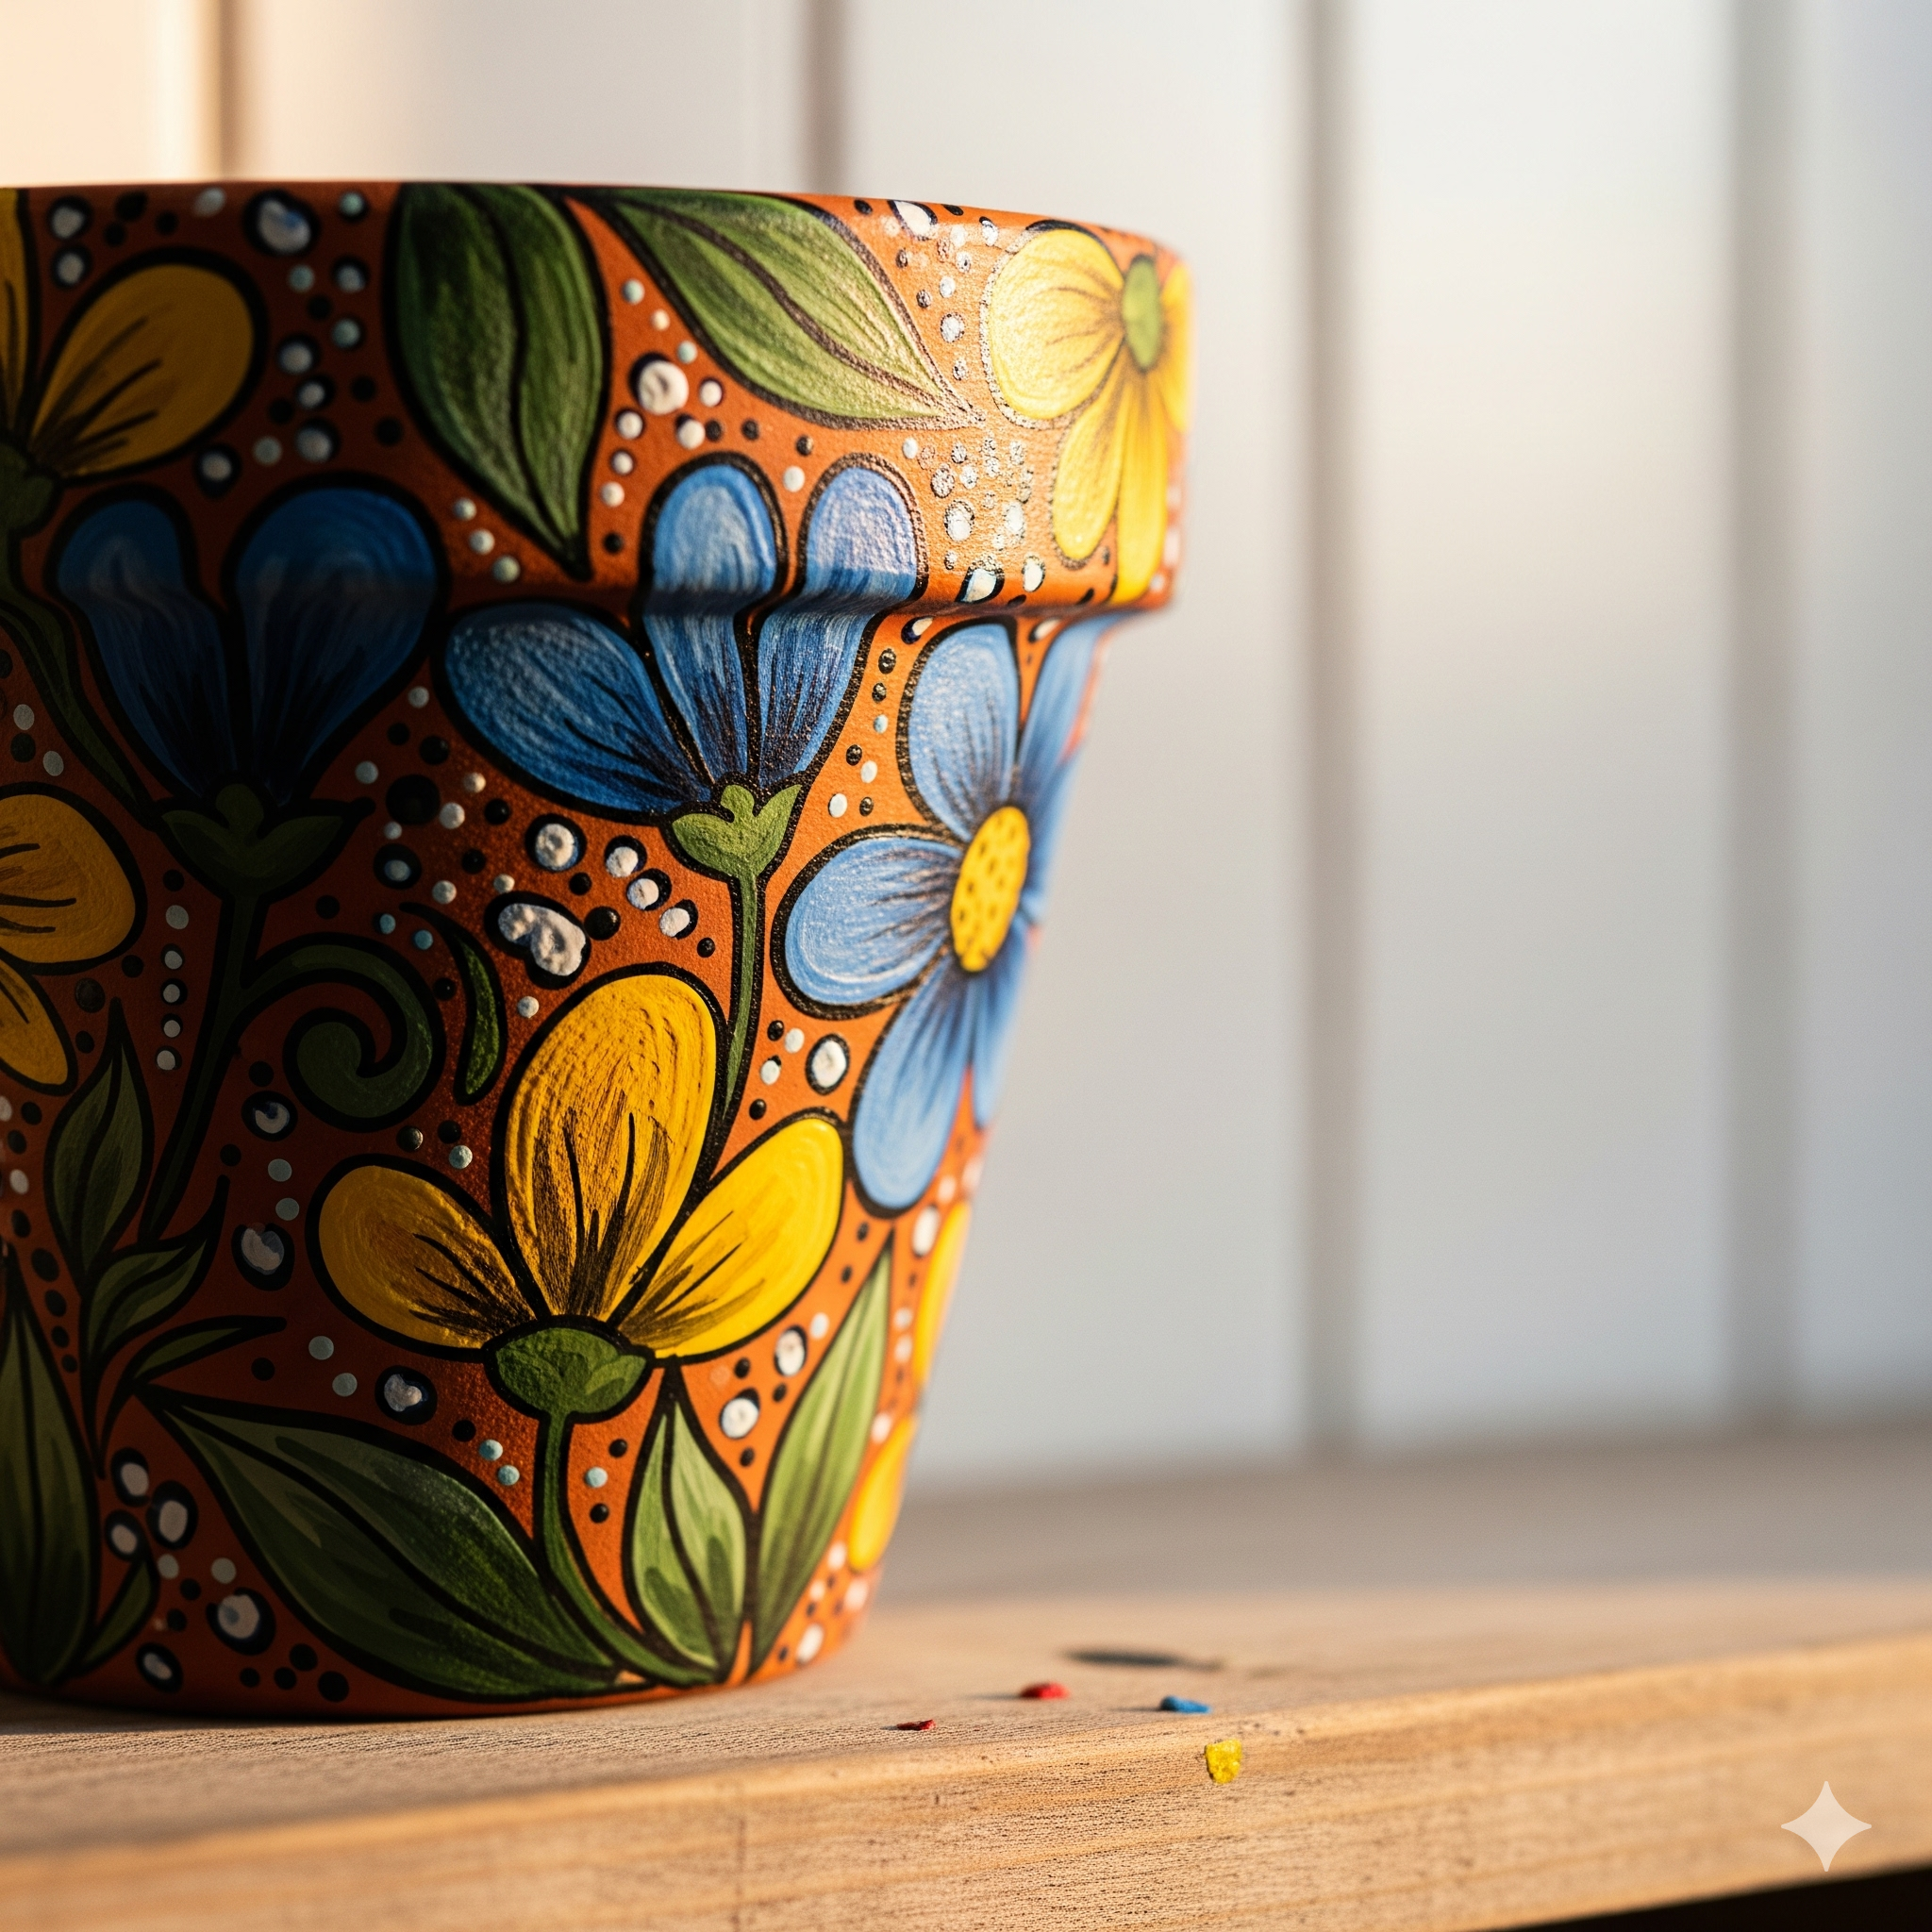
| 4. Painted Terracotta Pots | $5 – $15 | Terracotta pots, acrylic paint |
| 5. DIY Rope Basket | $10 – $20 | Cotton rope, hot glue |
| 6. Gold-Leafed Accents | $10 – $15 | Thrifted item, gold spray paint |
| 7. Hand-Stamped Textiles | $10 – $20 | Plain tea towel, fabric paint |
| 8. Mini Macrame Hanging | $5 – $10 | Dowel/stick, macrame cord |
| 9. Tin Can Organizers | $2 – $5 | Recycled cans, paint/paper |
| 10. Invisible Bookshelf | $5 – $10 | L-bracket, old hardcover book |
Project 1: Upcycled Glass Jar Lanterns and Vases
This is the quintessential upcycled home decor project. We all have glass jars from pasta sauce, pickles, or jam. Instead of tossing them in the recycling bin, give them a glamorous new life. This project is incredibly simple, shockingly inexpensive, and the results look wonderfully rustic and chic.
What You’ll Need:
- Clean glass jars of various shapes and sizes, labels removed
- Spray paint (I love matte white, black, or a metallic gold) or chalk paint
- Twine or ribbon (optional)
- Tea lights (battery-operated for safety) or small flower cuttings
Step-by-Step Instructions:
First, make sure your jars are sparkling clean and completely dry. The trick to removing stubborn sticky residue from labels is a little bit of cooking oil followed by soap and water. In a well-ventilated area (preferably outside), lay down some newspaper and apply a thin, even coat of spray paint to the outside of the jars. It’s better to do two thin coats than one thick, drippy one. If you’re using chalk paint, simply brush it on. Once the paint is fully dry, you can add details. I love wrapping the rim of the jar with jute twine for a farmhouse look. Then, simply pop in a tea light or fill with a bit of water and some wildflowers. This is one of the easiest cheap DIY home decor ideas for apartments, and it never fails to add a cozy glow.
Project 2: DIY Abstract Canvas Art
Large-scale art can be incredibly expensive, but a blank wall in an apartment is often begging for a statement piece. The solution? Make it yourself! You do not need to be a trained artist to create beautiful abstract art. This project is all about playing with color and texture, and it’s a fantastic way to create a custom piece that perfectly matches your color scheme.
What You’ll Need:
- A canvas (pro tip: buy a cheap, ugly painting from a thrift store and paint over it!)
- Acrylic paint in 3-4 coordinating colors (small craft bottles or sample pots from a hardware store are perfect)
- A large paintbrush and a smaller one
- Optional: Joint compound or spackle for texture, a putty knife
Step-by-Step Instructions:
If you’re using a thrifted canvas, start by applying a solid coat of white paint (or gesso) to create a blank slate. If you want to add texture, this is the time to do it. Use a putty knife to spread a thin layer of joint compound over the canvas, creating swoops and ridges. Let it dry completely. Now for the fun part: the paint. There are no rules here! You can create big blocks of color, use a dry brushing technique for a wispy look, or create an ombre effect. A great beginner’s guide to easy abstract techniques can be found all over Pinterest. Just search for “beginner abstract painting.” The key is to build layers and not overthink it. Let it dry, and you’ll have a massive piece of custom art for under $20.
Project 3: Fabric-Covered Bulletin Board
A plain cork bulletin board is functional, but not exactly stylish. With a simple piece of fabric, however, you can transform it into a beautiful and practical piece of wall decor. Use it in your home office to pin reminders, in your kitchen for grocery lists, or in your bedroom as a memory board for photos and ticket stubs. This is a perfect example of a budget-friendly decor item that is also incredibly useful.
What You’ll Need:
- A basic cork bulletin board (any size)
- A piece of fabric (cotton, linen, or canvas work best) about 2 inches larger than the board on all sides
- A staple gun
- Scissors
Step-by-Step Instructions:
First, iron your fabric to remove any wrinkles. Lay the fabric face down on a clean floor and place the cork board on top of it, also face down. Starting on one of the long sides, pull the fabric taut over the edge of the board and secure it to the back frame with a staple in the center. Move to the opposite side, pull the fabric tight, and place another staple in the center. Repeat this for the two shorter sides. Continue adding staples, working your way from the center out to the corners on all four sides, pulling the fabric taut as you go. For the corners, fold them neatly like you’re wrapping a gift and secure them with a few extra staples. Trim any excess fabric, and you’re done! You now have a custom, stylish organizer.
Project 8: Mini Macrame Wall Hanging
Macrame and boho decor can be quite pricey, but you can get the same vibe for a fraction of the cost by making a small-scale version yourself. This project is incredibly meditative and only requires you to learn a couple of basic knots. It’s a perfect way to add texture and warmth to a small wall space.
What You’ll Need:
- A dowel, stick, or piece of driftwood (foraged is free!)
- Macrame cord (a 3mm or 4mm natural cotton cord is great for beginners)
- Scissors
Step-by-Step Instructions:
The best way to learn macrame is visually. I highly recommend watching a short video tutorial. A great place to start is this beginner’s guide on YouTube, which covers the two most essential knots: the Lark’s Head knot (to attach the cord to the dowel) and the Square Knot (the building block of most patterns). Start by cutting several lengths of cord (the tutorial will guide you on length). Attach them to your stick using the Lark’s Head knot. Then, simply work in rows of square knots to create a pattern. You can leave the ends long and fringy or cut them into a V-shape. It’s a simple, repetitive process that yields a beautiful, handmade result, making it one of the most rewarding cheap DIY home decor ideas for apartments.
By investing a little bit of time and creativity, you can fill your apartment with pieces that are not only beautiful and affordable but also deeply personal. These projects are just the beginning—once you start seeing the potential in everyday items, a whole new world of upcycled home decor opens up. Happy making!
Frequently Asked Questions (FAQ)
I’m not crafty at all. Which project is the absolute easiest for a total beginner?
The Upcycled Glass Jar Lanterns (Project 1) or the Gold-Leafed Accents (Project 6) are the most foolproof. Both primarily rely on a can of spray paint, which is very easy to use. There’s no complex cutting, measuring, or artistic skill required. If you can spray paint an item, you can do these projects and get a fantastic result!
Where is the best place to find cheap supplies for these projects?
My top three places are: 1) The thrift store. It’s the best source for canvases, frames, vases, and other objects to upcycle. 2) The craft store’s clearance section. Always check the clearance aisle at stores like Michaels or JOANN for discounted supplies. 3) The hardware store. Sample pots of paint are incredibly cheap and perfect for small art projects.
How can I make my DIY projects look more professional and less “homemade”?
The secret is in the finishing touches. Take your time with the prep work—make sure surfaces are clean and sanded. Apply paint in thin, even coats to avoid drips. Measure twice and cut once. Use a high-quality glue. It’s the attention to these small details that elevates a project from looking crafty to looking like a high-end piece of decor. A final coat of a clear sealer (matte or gloss) can also add a professional finish to painted items.

Post Comment