DIY Vertical Garden Wall for an Outdoor Space
Learn how to build a DIY Vertical Garden Wall for an Outdoor Space with our guide. Explore pallet garden ideas and grow more food in less space!
Grow Up! How to Create a Vertical Garden and Grow More Food in Less Space
For those of us who live in apartments, tiny homes, or houses with small yards, the dream of a sprawling vegetable garden can feel just out of reach. We see our limited square footage and think that’s the end of the story. But what if I told you that you’ve been looking at your garden space all wrong? As a passionate small-space innovator at Neat Tiny Home, I’ve learned that the secret to a bountiful harvest isn’t about growing out; it’s about growing up. Vertical gardening is a revolutionary approach that transforms walls, railings, and fences into productive, living green spaces. It’s a game-changer for urban and small-space farming, allowing you to grow an incredible amount of food in a tiny footprint.
This is your ultimate, hands-on guide to the world of vertical gardening. We are going to explore a variety of incredible vertical vegetable gardening ideas that you can build yourself, no matter your skill level or budget. I’ll provide a detailed, step-by-step tutorial on how to create a lush DIY vertical garden wall for an outdoor space, and we’ll also dive deep into other popular projects, like the classic upcycled pallet garden. We’ll cover everything from the basic principles and benefits to the nitty-gritty of watering and maintaining your high-rise harvest. My goal is to show you that a lack of horizontal space is not a barrier to growing your own fresh, delicious food. It’s an invitation to get creative and reach for the sky.
The Upward Harvest: Why Vertical Gardening is the Future of Small-Space Farming
At its core, vertical gardening is a simple philosophy: if you can’t grow out, grow up. It’s the practice of using vertical surfaces to produce food, herbs, and flowers. This approach fundamentally changes our relationship with our available space. A 10-foot-long, 6-foot-high wall offers 60 square feet of growing area, which is the same size as a respectable in-ground garden bed, but it takes up zero floor space. This shift in perspective is what makes urban agriculture possible and allows anyone with a sunny balcony or a small patio to participate in the grow-your-own-food movement. It’s a solution that is not only practical but also incredibly beautiful, turning a boring wall into a living, edible work of art.
The Benefits: Increased Yield, Better Air Circulation, and Fewer Pests
The advantages of vertical gardening go far beyond just saving space.
- Increased Yield: By stacking plants vertically, you can grow significantly more produce per square foot than in a traditional garden.
- Healthier Plants: Lifting plants off the ground improves air circulation around the foliage, which can dramatically reduce the risk of fungal diseases like powdery mildew.
- Fewer Pests: It’s much harder for ground-dwelling pests like slugs, snails, and rabbits to reach your precious plants when they’re several feet in the air.
- Easier Harvest: Harvesting is a breeze when you don’t have to bend or kneel. Your vegetables are right there at eye level or waist level, making picking a quick and painless task.
Is a Vertical Garden Right for You? Assessing Your Space and Sunlight
Before you start building, you need to assess your chosen location. The most important factor, as with any vegetable garden, is sunlight. Most vegetables need at least 6 to 8 hours of direct sunlight per day to produce fruit. Find a wall, fence, or railing that receives this amount of sun. A south-facing or west-facing wall is ideal. You also need to consider the structural integrity of what you’re mounting to. A heavy gutter garden or pallet will need to be securely anchored to a sturdy fence or wall studs. Lastly, think about your water source. Is there a hose or spigot nearby? Vertical gardens can dry out quickly and will require consistent watering, so convenient access to water is a huge plus. This initial assessment is key to a successful DIY vertical garden wall for an outdoor space.
| Vertical Garden Type | Approx. Cost | Skill Level | Best Plants To Grow |
|---|---|---|---|
| Pallet Garden | $0 – $20 | Beginner | Herbs, lettuce, strawberries, flowers. |
| Gutter Garden | $30 – $60 | Beginner | Lettuce, spinach, radishes, strawberries. |
| Trellis System | $20 – $100+ | Beginner | Cucumbers, pole beans, peas, small melons. |
| Fabric Pocket Planter | $15 – $50 | Easiest (No Build) | Herbs, flowers, leafy greens. |
Project 1: The Classic DIY Pallet Garden (Beginner-Friendly)
The upcycled pallet garden is an icon of the DIY and urban gardening movements, and for good reason. It’s incredibly cheap (often free!), easy to put together, and creates a beautifully rustic, multi-tiered planter in minutes. It’s the perfect entry-level project for anyone wanting to dip their toes into vertical gardening. However, there is one critical safety consideration you must be aware of before you begin.
Sourcing a Safe, Heat-Treated (HT) Pallet
Not all pallets are safe for growing food. Some pallets are treated with harsh chemicals to prevent rot and pests. You must NEVER use a pallet that has been chemically treated. Look for a stamp on the side of the pallet. You are looking for the letters “HT,” which means the pallet was heat-treated, not chemically treated. Avoid any pallets with the stamp “MB,” which stands for methyl bromide, a toxic fumigant. Also, avoid any pallets that are brightly colored or appear to have had something oily spilled on them. The safest places to find clean, HT pallets are often from garden centers, hardware stores, or pet food stores. For a great visual guide on reading pallet stamps, check out instructional sites like 1001 Pallets.
Step-by-Step Tutorial:
- Prep the Pallet: Give your safe, HT pallet a good scrub with soap and water and let it dry. Use a sander or sandpaper to smooth any rough spots or splinters.
- Create the Pockets: You will need a roll of landscape fabric and a staple gun. Stand the pallet upright. You will be planting in the openings between the slats. For each opening you want to plant in, cut a piece of landscape fabric and use the staple gun to create a pouch or pocket inside the pallet. Staple the fabric to the front, back, and bottom slats of each opening to create a self-contained pocket that will hold your soil. Leave the very top opening accessible for larger plants.
- Fill and Plant: Lay the pallet flat on the ground. Fill each pocket and the top opening with a high-quality potting mix. Now you can plant your seedlings! Herbs, loose-leaf lettuce, strawberries, and marigolds are all fantastic choices for a pallet garden.
- Water and Wait: Water your newly planted pallet thoroughly and leave it lying flat for about a week or two. This gives the plants’ roots time to get established and hold the soil in place. After that, you can carefully stand it up in its sunny, final location.
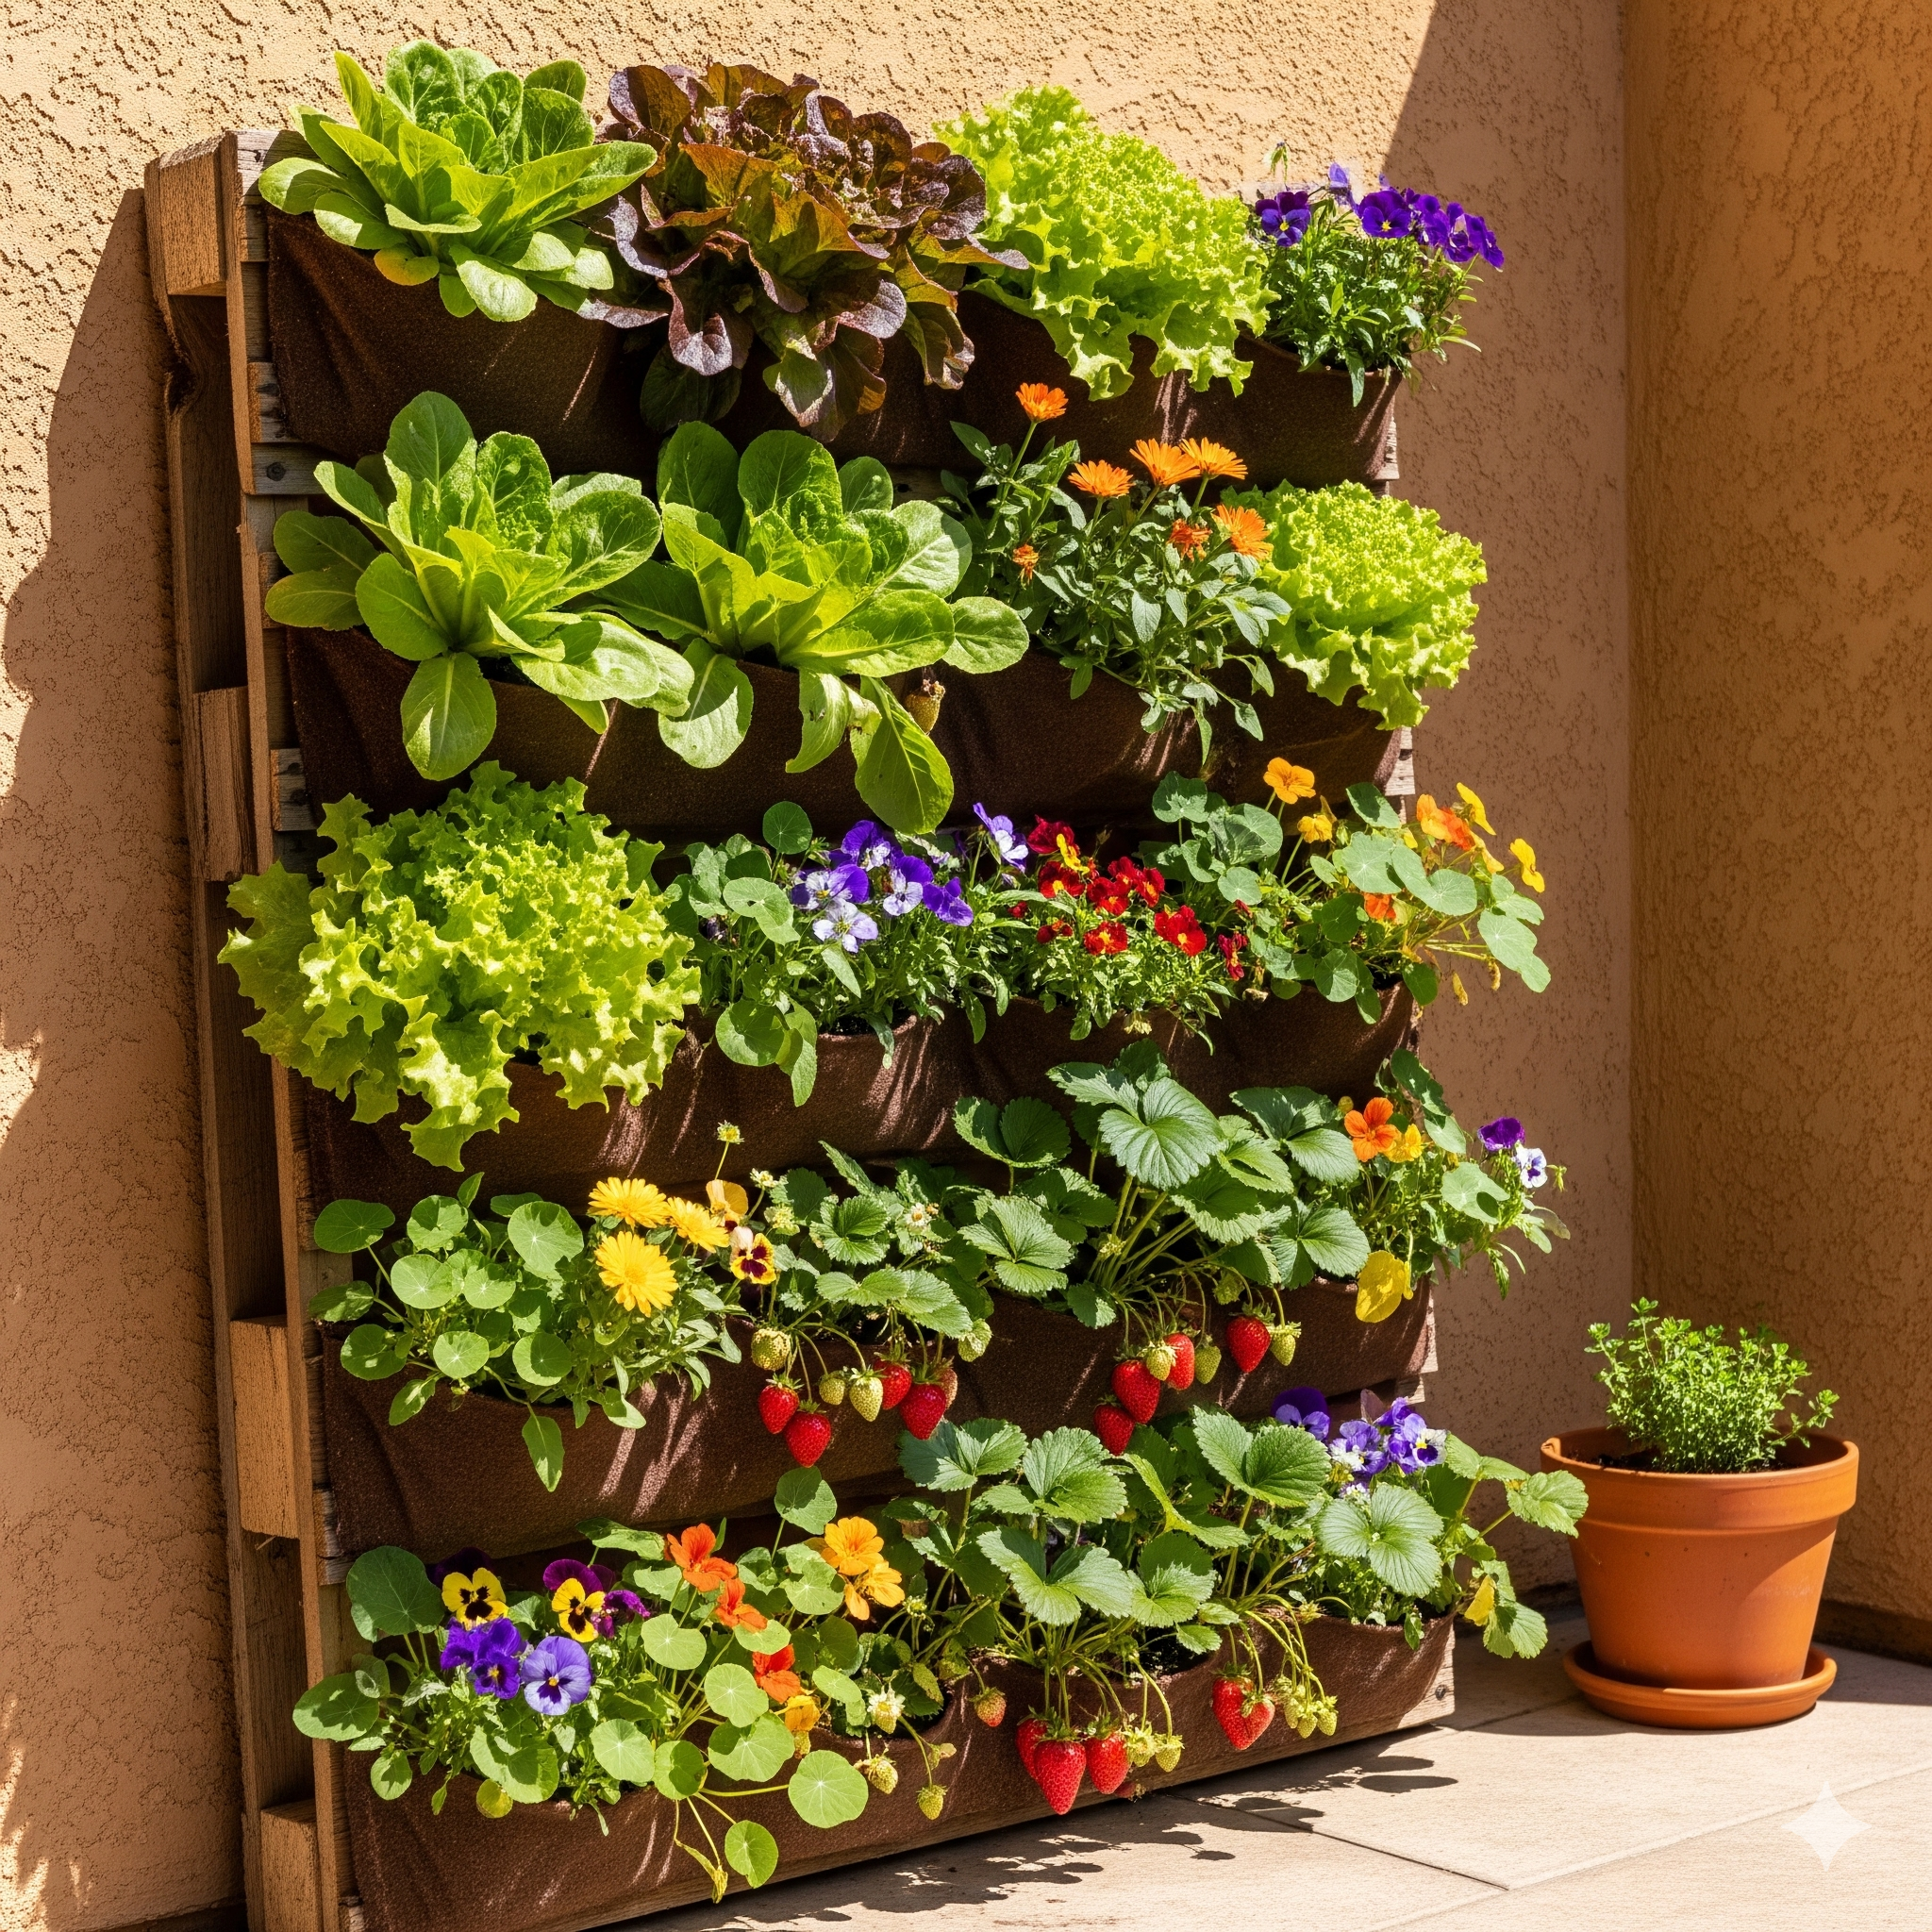
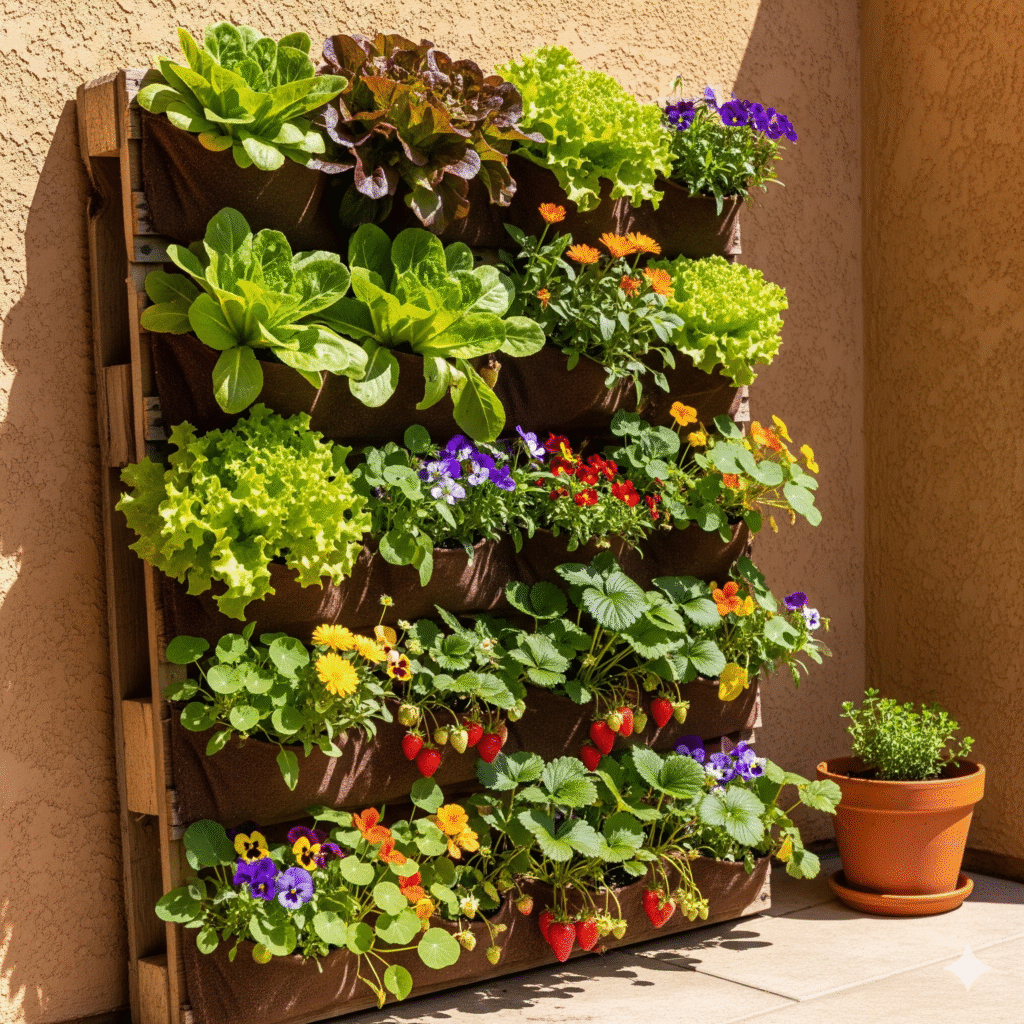
Project 2: The Gutter Garden – A DIY Vertical Garden Wall for an Outdoor Space
For a sleek, modern, and incredibly productive system, a gutter garden is one of my favorite projects. It’s a fantastic way to create a true DIY vertical garden wall for an outdoor space. Vinyl rain gutters are cheap, lightweight, and the perfect depth for growing a wide variety of shallow-rooted plants. You can mount them on a fence or wall in long, continuous rows or staggered for a more dynamic look. This is a perfect project for growing massive amounts of salad greens or creating a stunning wall of strawberries.
Step-by-Step Tutorial:
- Gather Materials: You’ll need sections of vinyl gutter, gutter end caps, a drill, gutter mounting brackets, and screws. You can find everything you need in the roofing section of a store like The Home Depot.
- Prep the Gutters: Cut your gutters to the desired length using a hacksaw. Attach an end cap to each end of every gutter section using a strong PVC cement. Next, use your drill to make drainage holes every 6-8 inches along the bottom of each gutter.
- Mount to the Wall: Plan your layout on your fence or wall. I recommend spacing the rows about 12-18 inches apart vertically to give the plants room to grow. Use a level to ensure your mounting brackets are straight. Screw the brackets securely into the wall or fence posts, and then simply snap your prepared gutters into place.
- Fill and Plant: Fill your gutters with a high-quality, lightweight potting mix. This is a great place to plant lettuce seedlings, spinach, radishes, or trailing strawberries. Water gently, and watch your living wall come to life!
This is one of the most productive vertical vegetable gardening ideas for leafy greens, providing a continuous harvest throughout the season.
Project 3: The Trellis and Vine System
Sometimes, the easiest way to garden vertically is to simply let the plants do what they want to do naturally. Many vegetables, like cucumbers, peas, and pole beans, are natural climbers. All they need is a sturdy structure to climb on. Providing a trellis is the simplest form of vertical gardening and a fantastic way to grow these productive vining crops in a small footprint. For amazing, in-depth growing guides for specific vegetables, I always trust the resources from a reputable seed company like Johnny’s Selected Seeds.
Building a Simple and Sturdy Trellis:
You can build a simple trellis in a large pot or a raised bed. One of the sturdiest and cheapest methods is using a cattle panel or a piece of wire fencing, which you can arch over a bed or place vertically. An even simpler method for a single pot is a teepee trellis. Simply insert three or four tall bamboo stakes into the pot around the outer edge and tie them together at the top to form a teepee. As your bean or pea seedlings grow, gently guide them to the poles, and they will happily climb their way to the top. A great guide on building various types of trellises can be found on gardening blogs like Gardener’s Supply Company.
Maintaining Your Vertical Vegetable Garden
Vertical gardens have a few unique care requirements. Because they are in containers and more exposed to sun and wind, they have different watering and feeding needs than an in-ground garden. Staying on top of these tasks is the key to a healthy, productive harvest.
The Challenge of Watering: The #1 Task
Watering is the most critical and time-consuming task for any container gardener, and this is doubly true for vertical gardens. The small soil volume and increased exposure to the elements mean they can dry out very, very quickly, especially on a hot, windy day. You must check your vertical garden daily, and you will likely need to water it every day in the heat of summer. Water thoroughly until it runs out of the drainage holes. For larger installations, consider installing a simple drip irrigation system on a timer. This can be a huge time-saver and ensures your plants get consistent moisture. You can find easy-to-assemble kits for this online.
Vertical gardening opens up a whole new world of possibilities for anyone with a small space. By thinking creatively and utilizing the upward dimension, you can create a garden that is not only incredibly productive but also a stunningly beautiful addition to your home.
Frequently Asked Questions (FAQ)
The soil in my pallet garden seems to wash out when I water it. What can I do?
This is a common issue, especially at first. Make sure you’ve packed the potting mix in firmly. Watering gently with a watering can rather than a powerful hose nozzle will help. As the plant roots grow, they will create a network that does a much better job of holding the soil in place. This problem usually lessens significantly after the first few weeks.
What are the best vegetables for a shady vertical garden?
If your wall only gets 3-4 hours of direct sun, you can’t grow fruiting vegetables like tomatoes or cucumbers. However, you can absolutely grow a fantastic salad garden! Focus on loose-leaf lettuce, spinach, arugula, kale, and most culinary herbs like mint, parsley, and chives. These “cut-and-come-again” greens will be perfectly happy in partial shade.
My vertical garden is on a balcony. How do I deal with water draining onto my downstairs neighbor?
This is a very important consideration! You must use a saucer or tray under every pot to catch excess water. For systems like gutter gardens, you can get creative. Some people install a final “catch” gutter at the very bottom, which then directs all the runoff into a single bucket via a downspout. Being a courteous gardening neighbor is key to a happy apartment living experience.
Post Comment